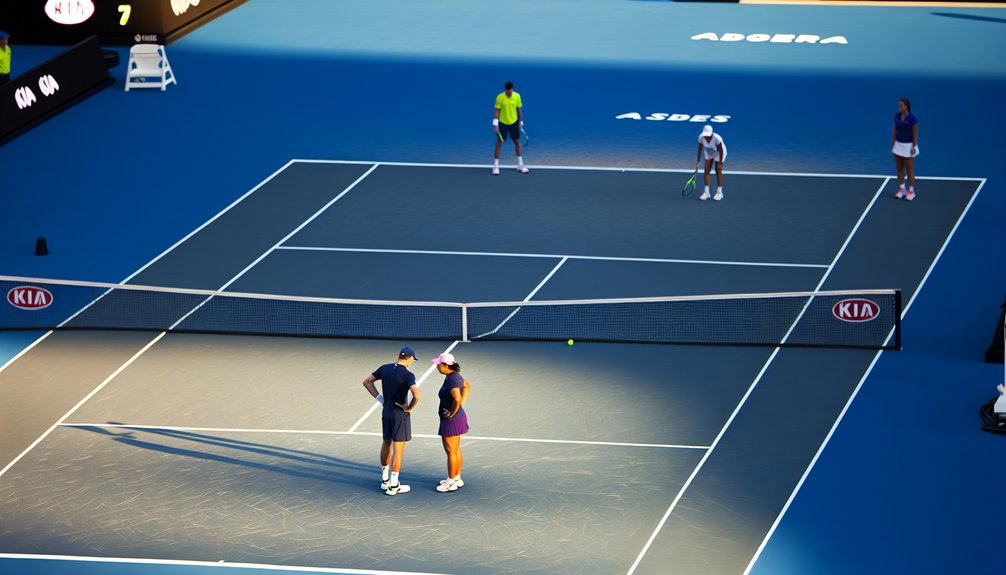
You probably don’t know that in 2026-level doubles, elite rotations are planned by ball height zones and predicted contact points, not just “left-right” instincts. When you choose front-back versus side-by-side, you’re really choosing a coverage algorithm that dictates who owns which trajectory at which moment. If your micro-rotations aren’t pre-scripted and communicated, small gaps appear—gaps good pairs punish. To tighten those gaps, you’ll need a clear framework for every phase of the rally.
Key Takeaways
- Link your movement to ball height, speed, and direction, not your partner’s last spot, to keep rotations readable to each other but unpredictable to opponents.
- Use front-back when you or your partner can attack a shorter or rising ball; the net player owns everything above net height and poaching lanes.
- Use side-by-side when defending deep or wide balls; match depth laterally and avoid crossing the central seam without clear communication.
- Transition continuously between formations during rallies, resetting to side-by-side under pressure and shifting to front-back as soon as you create an attackable ball.
- Assign clear roles—Attack Leader and Support Controller—so one drives offense while the other manages court coverage, tempo, and protection during rotations.
Understanding the 2026 Doubles Rotation Landscape
Although the core rules of doubles remain stable, the 2026 rotation landscape reshapes how you must think about roles, synergies, and tempo. You can’t just “play your side” anymore; you must design rotations that flow cleanly between serve, return, neutral exchanges, and pressure phases.
You start by mapping three states: structured (planned formations), adaptive (in-rally adjustments), and emergency (scramble recovery). For each state, you define who initiates pressure, who stabilizes, and how you reset.
Rule updates on let-calls, extended no-volley interpretations, and stricter hindrance enforcement all reward earlier positional commitments. That means you pre-plan micro-rotations triggered by ball height, opponent contact point, and your partner’s shot intent, so rotations become predictable to your partner but unreadable to opponents.
Core Principles of Front-Back Court Coverage
You’ll anchor your front-back system by defining exact responsibilities for the net player (pressure, interception angles, poaching lanes) and the baseline player (depth, rally pacing, overhead insurance). Once these roles are clear, you must coordinate seamless rotational coverage so that any ball that displaces one player triggers an automatic, pre-agreed shift by the partner. Your objective is to maintain uninterrupted court integrity, ensuring that no central seam or deep lane remains unassigned at any moment.
Defining Front-Back Roles
As the front player, you own everything above net height, prioritize poaching lanes, and protect the middle first, alley second. Your position is compact: inside the service box, rackets-up, prepared for reaction volleys and overheads.
As the back player, you’re responsible for high, deep, and wide balls. You build patterns: heavy crosscourt, deep through-the-middle, and disciplined lobs. You also call shot intentions early so your partner can commit to aggressive net positioning while you maintain depth, spin, and margin from behind.
Seamless Rotational Coverage
Two players can only cover a doubles court efficiently if they rotate as a single unit, not as two independent movers. You’re not just switching spots; you’re preserving angles, spacing, and strike zones while the shuttle (or ball) travels. Your first task is to link your movement to the ball’s trajectory, not to your partner’s last position.


| Situation Image | Rotational Principle |
|---|---|
| Lifted deep on your side | You drop; partner slides back-center |
| Driven middle | Both compress toward center seam |
| Short block to net | Front closes; back shifts to cover line |
| Wide push to alley | Nearest recovers; partner shifts inside |
| Opponents forced back | You advance together, preserving depth |
Think “elastic band”: distance adjusts, connection never breaks.
Core Principles of Side-by-Side Court Coverage
While many doubles patterns vary based on formation, side‑by‑side court coverage always rests on a few non‑negotiable principles: clear lateral responsibility, synchronized depth, and disciplined middle control. You own your half from alley line to an agreed central seam; your partner owns the other. You don’t cross that seam unless you’ve clearly called and recovered.
Your depth must match vertically. If you’re three feet behind the baseline and your partner’s on it, you open diagonal lanes and lob space. Stay on the same depth “line” so volleys, drives, and lobs present similar difficulty to both sides.
Finally, compress the middle. Prioritize balls within one step of the seam over wide bait. Force opponents to over‑target low‑percentage sidelines.
When to Choose Front-Back Vs Side-By-Side
Although side‑by‑side coverage is the default defensive shell, smart doubles teams deliberately shift between front‑back and side‑by‑side based on ball height, pressure, and court position. You prioritize front‑back whenever you’ve created a clear attacking phase: you or your partner have a shoulder‑high ball, can hit down, and can threaten the middle or a weaker defender. The front player hunts short replies; the rear player loads for the next heavy shot.
You’ll stay side‑by‑side when you’re under pressure, defending against drives, or facing very flat, fast exchanges where lobs are unlikely. Use side‑by‑side if both opponents stand deep, hitting heavy, penetrating shots that push you back. In neutral rallies, default to side‑by‑side until you earn a decisive height or positioning advantage.
Seamless Transitions Between Formations During Rally Play
Because doubles points evolve quickly, your real advantage comes from how smoothly you and your partner shift between side‑by‑side and front‑back as the ball’s height, pace, and location change. You must anticipate these shifts before contact, using the incoming ball’s trajectory to pre‑load your footwork pattern.
On any short, attackable ball, rotate toward front‑back: the striker moves forward into the court; the partner shades diagonally behind to cover depth and angle. On deep, defensive balls, recover to side‑by‑side, prioritizing lateral spacing and equal court coverage.
Drill “hit‑and‑move” patterns: after every stroke, you either close toward the net line or fan out laterally, never pausing in no‑man’s‑land. Your goal’s continuous, purposeful re‑positioning, not static formations.
Communication Cues and Nonverbal Signals for Partners
Effective doubles communication starts with a shared, repeatable set of verbal and nonverbal cues that both partners can read under pressure at full speed. You need a compact vocabulary: “switch,” “stay,” “mine,” “yours,” “cross,” “line.” Keep calls early, loud, and single-syllable when possible to cut through crowd and impact noise.
Nonverbal signals govern pre-point intentions and in-rally confirmation. Use discrete hand signals behind the back to indicate serve targets and planned first-rotation (front–back or side-by-side). Pre-agree exact meanings and never improvise mid-match. During rallies, rely on foot-stomps, paddle taps, or brief vocal cues at opponent contact, not during your own. Maintain constant micro-glances, shoulder alignment, and distance checks to verify spacing and instantly detect partner movement or hesitation.
Role Assignments: Attack Leader and Support Controller
In high-level doubles, you’ll assign one player as the primary Attack Leader and the other as the Support Controller to create clear, non-overlapping tactical duties. You must understand exactly who drives net pressure and finishing patterns, and who manages court coverage, tempo, and shot selection safety. With these roles defined, you’ll then coordinate constant, efficient communication so both players can adapt or swap responsibilities in real time without hesitation.
Defining Primary Attack Leader
Although both partners share responsibility for creating pressure, the primary attack leader is the player designated to initiate, drive, and finish most offensive patterns, while the support controller structures points so those attacks are high‑percentage. You’re the attack leader if your weapons (serve, first volley, forehand, overhead, poach) are measurably stronger and more reliable under stress.
Your core definition is directional authority and finishing responsibility. You choose when to accelerate, where to apply first-strike pressure, and which opponent to target. You prioritize court positions that maximize forehands and overheads, and you accept that your error tolerance is slightly higher because you’re dictating. You must read ball quality, recognize short or floating replies instantly, and convert them into decisive, high‑margin finishes.
Support Controller Responsibilities
While the attack leader owns directional authority, the support controller’s job is to engineer repeatable situations where those weapons can do maximum damage with minimum risk. You operate as the pattern architect: choosing rally shapes, ball heights, and spin profiles that keep your partner in favored strike zones while denying clean counter‑lanes.
Your core responsibilities:
- Control tempo: use depth, height, and spin to slow or accelerate rallies to your partner’s preferred strike window.
- Build space: steer balls away from your partner’s lane, opening cross or middle for their high‑value swings.
- Protect shifts: cover middle and plug obvious counters whenever your partner moves forward or changes position.
- Force predictable replies: target opponent weaknesses that reliably produce floaters or scripted defensive patterns.
Communication Between Role Partners
Because attack leader and support controller are interdependent roles, your communication must define not just who owns the ball, but which patterns you’re actively building and which risks you’re willing to accept. You’re not “chatting”; you’re issuing compressed, pre‑agreed commands that instantly trigger rotations, poaching routes, or defensive shields.
Use short, stable code words, never ambiguous narration. Every call should specify ball intent, spacing, and risk.
| Cue Phrase | Attack Leader Response | Support Controller Response |
|---|---|---|
| “Yours” | Commit to strike, ignore lob threat | Drop, cover opposite channel |
| “Switch” | Cross behind, assume new corridor | Slide across, reset screen position |
| “Press” | Step in, target high‑percentage gap | Close middle, anticipate counter |
| “Shield” | Contain, avoid low‑margin winners | Own lobs, stabilize depth and tempo |
Defensive Recovery and Turning Defense Into Offense
In high‑level doubles, defensive recovery isn’t passive scrambling; it’s a structured sequence of positioning, shot selection, and team coordination that stabilizes the rally and creates a counter‑attack window. You defend to reset, then to flip initiative. After absorbing pressure, your priority is to re‑establish a compact formation—front‑back against deep drives, side‑by‑side against heavy angles—while denying your opponents clear targets.
Your “escape” shots must be low‑risk, structure‑restoring balls:
- Use high, deep lobs when both opponents are crowding the net.
- Aim heavy crosscourt resets to the weaker volleyer or mover.
- Direct blocks and chips toward the middle to freeze both players.
- Target their shift zones: at their feet as they move forward.
Once they’re off‑balance, you advance and re‑seal ideal spacing.
Practice Drills to Automate Rotations and Positioning
Although you can understand rotations conceptually, they only become reliable under pressure when you’ve automated them through targeted drills that hard‑wire spacing and movement patterns. Build short, high‑repetition sequences with clear cues. For front‑back, feed a neutral ball, call “drive” or “lob” mid‑rally, and execute the appropriate pinch‑and‑expand pattern on every call, freezing for one second in end positions to verify spacing.
For side‑by‑side, run cross‑court rallies where the outside player must decide to stay parallel or convert to front‑back based on ball depth; your rule: deep = stay, short = rotate.
Finally, run “scramble starts”: begin from deliberately bad positions and execute the fastest legal rotation back to your default formation, emphasizing communication words and recovery lines.


