
Most players lose points not because of weak skills, but because their accessories quietly limit speed, control, and recovery. If you’re training seriously, you can’t treat shoes, grips, strings, and shuttle choice as afterthoughts. Each piece of gear should match your movement pattern, stroke mechanics, and training volume so it supports your joints, sharpens feedback, and reduces fatigue. Once you understand how to make those choices systematically, your practice feels very different…
Key Takeaways
- Choose shoes with good cushioning, ankle support, and court-specific grip to handle rapid direction changes and jumps safely.
- Match racket grip thickness and surface tackiness to your hand size and sweat level for optimal control and shot precision.
- Select shuttlecocks (plastic, training feather, or tournament feather) and speeds based on your level, drill goals, and hall temperature/humidity.
- Use protective gear—knee sleeves, ankle stabilizers, and wrist/elbow supports—aligned with your injury history and movement patterns.
- Invest in recovery and training aids like foam rollers, agility ladders, and resistance bands to improve footwork, power, and post-session recovery.
Understanding Your Training Goals and Play Style
Before you invest in training accessories, you need a clear picture of what you’re trying to improve and how you actually play. Start by defining specific, measurable goals: faster racket head speed, higher shuttle control under pressure, more explosive direction changes, or improved consistency in long rallies.
Next, analyze your current play style. Are you an attacking baseline player relying on steep smashes, or a control-oriented player using tight net shots and placement? Do you win points through power, precision, or endurance? Review match footage, track unforced errors, and note where rallies typically break down—late preparation, mistimed splits, or weak shifts.
Map these findings to priority skill areas so every accessory you choose solves a concrete performance gap. Consider also how racket attributes like weight distribution influence the specific skills you’re training and the accessories that will best support them.
Court Footwear That Protects Joints and Boosts Agility
To protect your knees and ankles through explosive lunges and repeated jumps, you need court shoes with targeted cushioning and impact support matched to your body weight and movement patterns. You’ll also require a sole that offers precise grip and traction, allowing you to accelerate, decelerate, and change direction without slipping or over-rotating. By selecting footwear engineered for stability in lateral movements, you reduce joint strain while maintaining maximum agility at the net and in the rear court.
Cushioning and Impact Support
Although racket choice and technique often get top billing, it’s the right court footwear—specifically its cushioning and impact support—that does the most to protect your joints and sustain explosive agility through long training sessions. You need a midsole with responsive EVA or TPU foam that compresses under load yet rebounds quickly, reducing peak forces on your ankles, knees, and hips during lunges and jump-smashes.
Prioritize shoes with a multi-density midsole: softer zones under the heel for landing absorption, slightly firmer foam under the forefoot for rapid push-off. Look for impact ratings or energy-return data if brands provide them. Ascertain there’s adequate cushioning without excessive stack height, which can delay ground feedback and slow reaction time. Replace shoes once compression lines stay visible and cushioning feels “bottomed out.”
Grip, Traction, and Stability
While cushioning manages vertical impact, grip and stability determine whether that force translates into controlled movement or risky slips and twists. You need a non-marking rubber outsole with a tacky compound optimized for indoor courts, not generic gym shoes. Look for multidirectional tread patterns that support explosive lunges, split-steps, and recovery shuffles without “catching” and stressing your knees.


Prioritize a low-to-the-ground profile; excessive stack height makes your ankle roll more easily. Lateral stability features—outrigger soles, reinforced sidewalls, and secure midfoot lockdown—keep your foot from sliding over the midsole on hard cuts. Ascertain the heel counter is rigid and the forefoot flexes primarily at the metatarsal line. Finally, test traction under real court conditions; dusty floors expose weak outsole designs.
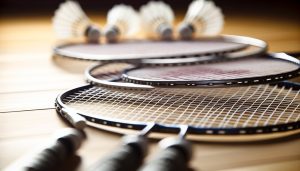
Choosing the Right Grips for Control and Comfort
Even with a perfectly balanced racket, the wrong grip can waste power, reduce control, and increase injury risk. You should first match grip thickness to your hand size: too thick limits finger control; too thin forces you to squeeze, creating forearm tension and slower racket-head speed. Use overgrips to fine‑tune girth millimeter by millimeter.
For control, prioritize tacky or semi‑tacky surfaces that anchor your fingers during rapid grip changes, especially for net kills and drives. If your hands sweat heavily, choose perforated or dry-feel grips to maintain friction without slipping. Always wrap from butt cap upward with consistent overlap to avoid pressure points. Replace grips as soon as edges fray, flatten, or become slick—degraded grips directly erode precision and touch. Mastering quick grip changes improves reaction time and adaptability in fast rallies, emphasizing the importance of grip versatility.
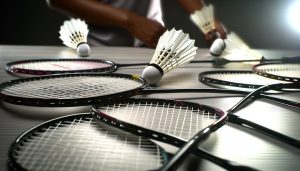
Shuttlecocks for Drills, Match Play, and Skill Levels
Because shuttlecocks directly determine flight consistency, timing, and feedback on every stroke, you need to match type and speed to your drill purpose and playing level. For high-repetition drills, you’ll usually favor durability and cost-efficiency; for match play and advanced control work, you’ll prioritize realistic flight and touch.
Use this framework:
- For beginners, choose slower plastic shuttles; they extend rally time and simplify timing.
- For intermediate drills, mix plastic for volume work and mid-grade feather for control sessions.
- For advanced players, train mostly with tournament-grade feather to mirror competition conditions.
- For power and defense drills, pick faster speeds; for precision and net drills, use slower speeds.
- Always test speed in your hall conditions (humidity, temperature) and adjust shuttle speed ratings accordingly.
Strings and Tension Settings for Power and Precision
Although strings are often treated as an afterthought, their material, gauge, and tension settings are just as critical to your power and precision as the racket frame itself. You should first select a gauge: thinner strings (0.61–0.66 mm) give more repulsion and bite on the shuttle but reduce durability; thicker strings (0.68–0.72 mm) trade feel for longevity.
For tension, prioritize your playing level and style. Lower tensions (20–24 lbs) create a deeper “trampoline” effect for easier power and a larger sweet spot, ideal if you’re developing technique. Higher tensions (25–30+ lbs) enhance shuttle control, feedback, and flat drives but punish off‑center hits. Always match tension to your racket’s recommended range and restring once feel drops noticeably. Modern multifilament constructions also offer a softer feel and improved comfort for players prone to arm fatigue, making them a good option for arm-friendly strings.
Protective Gear for Injury Prevention and Recovery
When you push your training volume and intensity, targeted protective gear becomes critical for joint integrity and long-term performance. You’ll need to select essential joint supports—such as knee braces, ankle stabilizers, and wrist wraps—based on your movement patterns, past injuries, and current load. Complement these with recovery tools and aids like compression sleeves, massage rollers, and cold-therapy options to accelerate tissue repair and keep you available for more high-quality sessions.
Essential Joint Supports
Even with perfect technique and conditioning, badminton’s high-impact footwork and explosive changes of direction put heavy stress on your ankles, knees, and wrists, making targeted joint supports a key part of serious training. You’re not just “protecting” joints; you’re stabilizing kinetic chains so you can load harder, react faster, and maintain alignment under fatigue.
When choosing supports, prioritize anatomical fit, graduated compression, and freedom of movement in key planes (especially dorsiflexion and forearm rotation). Focus on:
- Ankle braces with figure-8 strapping to limit inversion without blocking push-off.
- Knee sleeves with patella tracking and mild medial–lateral support.
- Wrist wraps that stabilize extension while allowing finger dexterity.
- Elbow supports targeting tendon offload during repeated smashes.
- Lightweight, breathable materials that won’t trap heat or restrict sprint patterns.
Recovery Tools and Aids
Because high-performance badminton loads tissues with thousands of submaximal impacts and abrupt decelerations, recovery tools and aids act as “maintenance hardware” that keeps your system durable enough to train hard again tomorrow. Prioritize tools that improve circulation, modulate tissue tone, and offload overloaded structures.
Use a firm foam roller and lacrosse or massage balls to target calves, quadriceps, glutes, and forearms, restoring sliding between muscle layers. Add compression boots or graduated compression sleeves post-session to enhance venous return and reduce lower-limb swelling.
For localized overload (patellar tendon, Achilles, shoulder), employ adjustable ice-compression wraps to control inflammation without numbing proprioception. Finally, consider a simple massage stick and mini-band set for active recovery drills that realign tissue, maintain range, and reinforce joint stability.
Training Aids to Improve Footwork, Speed, and Timing
Although natural court drills are essential, targeted training aids let you sharpen footwork, acceleration, and shuttle timing with far greater precision and repeatability. When you select tools, focus on measurable gains: split-step sharpness, first-step explosiveness, and deceleration control into shots.
- Agility ladders: engrain small, efficient steps, improving center-of-gravity control in defensive and recovery patterns.
- Flat markers or cones: map specific movement lines for chasse, lunge, and crossover sequences.
- Resistance bands: load your split step and directional push-off to build badminton-specific power.
- Reactive lights or beepers: randomize visual or auditory cues to simulate opponent deception and improve timing.
- Multi-shuttle feeders or machines: constrain intervals to high tempo, reinforcing rhythm, contact point consistency, and recovery speed between strokes.
Players should also practice strategies to block out opponent distractions, since mind games can alter concentration and match outcomes.
Bags, Towels, and Hydration Essentials for Organized Practice
Sharpened footwork and timing only convert into match performance when your sessions run efficiently, and that hinges on how you organize your gear, recovery, and fluids. Choose a badminton-specific bag with ventilated shoe and wet compartments, plus internal dividers for rackets, shuttles, and accessories. This minimizes search time and protects string tension and grip surfaces from sweat and impact.
Carry at least two towels: a small, quick-dry microfiber for on-court sweat management and a thicker towel for post-session cooling or warmth control. For hydration, use a marked, BPA-free bottle (750 ml–1 L) so you can quantify intake and mix electrolytes accurately. Pre-fill and position it courtside to guarantee frequent, small sips rather than sporadic, large gulps.
Monitoring Progress With Wearables and Simple Tracking Tools
One of the most effective ways to turn practice into measurable improvement is to quantify what you’re doing instead of relying on feel. You don’t need elite-level tech; you need tools that consistently capture meaningful data and are simple enough to use every session.
Use wearables and basic trackers to log objective metrics:
- Wrist-based heart rate monitor to control training zones and recovery.
- GPS or indoor tracking app to record session duration, intensity, and movement volume.
- Simple rally counter or clicker to track shuttle contacts and unforced errors.
- Spreadsheet or notes app template to log drills, scores, and perceived exertion.
- Smartwatch or fitness band with interval timers and vibration alerts for work–rest ratios.
Review data weekly, then adjust drill volume, intensity, and recovery accordingly.
